Updated 180320: Added a section on how to fix your aeropress when the seal leaks. Spoiler alert: buy a replacement Aeropress rubber seal or food-grade mineral oil to fix your old one.
Updated 170707: Added a fast and easy way to make iced decaf coffee with your Aeropress here.
Updated 150330: Over the past year I’ve been in even more of a rush to get out the door in the morning, so have developed an even faster Aeropress method based on the traditional non-inverted method as suggested by the manufacturer. Click here for the new video and Geeky details.
A Facebook friend asked, “How do you make the best coffee with the Aeropress upside down?” The inverted Aeropress trick is how we choose to brew the best coffee when I’m traveling or in a big rush to get out the door.
Yup. Believe it or not, this is another article dedicated to my beloved brew – coffee.
Why use the Aeropress?
I’ve already shared my daily brew method, so why bother with the Aeropress at all?
Since we’re literally pushing coffee out of the brew chamber, the Aeropress shaves precious minutes from my usual immersion brew method. When I’m truly in a rush, this is my coffee maker of choice.
Aeropress Pros:
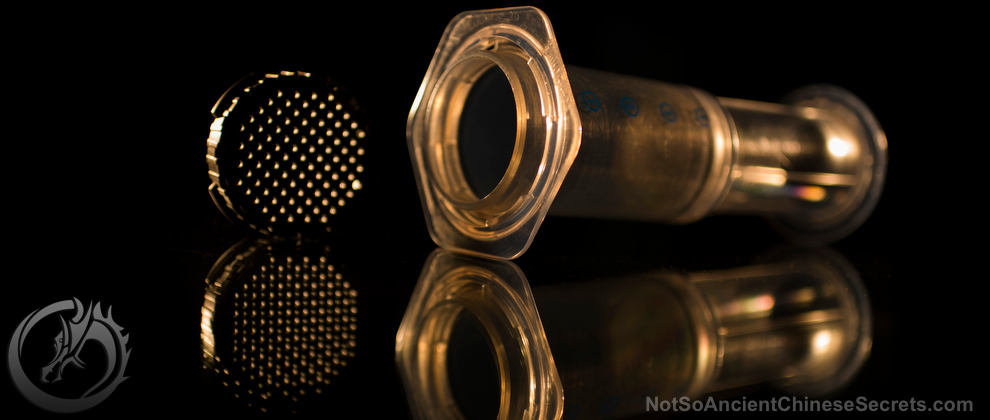
The Aeropress’s deceptively simple design belies its powerful coffee-making ability. The Aeropress gives you control over every aspect of the brew process including coffee to water ratio, water temperature and steep time.
It’s compact and lightweight design also makes the Aeropress the best travel coffee maker. If you can get your hands on good beans and hot water, a hand-cranked burr grinder and Aeropress can make an exceptional cup of joe pretty much anywhere.
Bonus Asian rice points: at $25 the Aeropress is inexpensive to purchase and maintain.
Aeropress Cons:
As amazing as it is, the Aeropress has a few shortcomings. The first of which is its all-plastic build.
Don’t get me wrong: the Aeropress plastic is of great quality and BPA-free. Amazingingly my old and trusty Aeropress looks and works as good as new and hides its age well. But recent reports raise the alarm that even BPA-free plastics may leach harmful estrogen-like chemicals. That’s why our recommended daily brewer is made of porcelain.
Another issue I have is with the manufacturer’s recommended brew instructions. Because water is immediately free to leak out of the brew chamber, the standard Aeropress method requires more coffee grinds to achieve a similar strength when compared with other brew methods. If you love coffee like me, you’re likely spending a small fortune on great beans or worse: are crazy like me and home-roasting your own.
Luckily, there’s a way to fix this last issue, and it’s as simple as flipping the Aeropress upside-down.
Why the Best Aeropress coffee is made Upside Down
Inverting the Aeropress allows the coffee to be fully immersed in hot water just like with a French press. The problem with French press is (a) the grittiness (some call it “body” but lets call it what it is) and (b) over-extraction due to continuous immersion of the beans even after taking the plunge.
An upside-down Aeropress bests French press in both areas. The paper filter makes an incredibly clean cup with no grittiness. And because you have full control over the steep time, you can prevent the over-extracted bitter and acidic notes commonly found in French press.
They say a picture is worth a thousand words. I’m hoping the video below is at least worth a couple hundred.
Inverted Aeropress Coffee Brewing Tips
- Burr grind your beans. The Aeropress is very forgiving with regards to coarseness of grind. But having a great hand or automatic burr grinder is essential to achieve consistent results. Start with a medium grind and refine as needed. Finer grinds will require less steep time but more effort during the plunge.
- Play with water temperature. You’d think this would be a simple thing to recommend, but water temp makes a HUGE difference to the finished cup. I find boiling water makes for a bitter cup. On the other extreme, the manufacturer recommends super-low brew temps of 165-175F. Me? I use my uber-geeky kettle with digital temperature control and find 190°F to be great for my bean/grind/taste. Start somewhere and adjust as needed: too bitter? Try cooler brew water.
- Bean/Water ratio: start with 22g beans/360g water (yields 300g of brewed coffee). Too weak? More beans. Too strong? Less beans.
- Use a wooden chopstick instead of the included paddle to stir. Not plastic. Less surface area for grinds to stick to. With the right technique simultaneously allows greater water-pouring precision and easy clean-up (as seen in the above video). Longer stir time = more flavour. Adjust as needed.
- Steep time. Really dependant on coarseness of ground beans and water temp. I’m too lazy to change the grind on my stepless worm-drive coffee grinder
from my favourite drip, so mine is overly coarse. I use a 3 minute steep time and wouldn’t recommend going longer for fear of over-extraction. If this were my daily grind I’d go finer and aim for a 2 minute steep time.
Traditional Aeropress Brewing Tips
Going reverse not your thing? Not to worry: the video below shows how we maximize the “traditional” right-side-up Aeropress method to get the fastest and best cup we can.
The biggest change to the recommended instructions is our grind. Instead of a coarse drip grind I use a fine espresso grind. The finer grind speeds extraction by increasing the surface area as well as prevents water from dripping through the paper filter before plunging.
As with all things coffee, you can always tweak with the variables of bean/water ratio, grind, water temperature, agitation and steep time to create the truly unique brew you prefer.
Fast and Easy Aeropress Iced Coffee Method
I’m going to lose my coffee-nerd card by recommended Costco’s Kirkland decaf pre-ground coffee beans for this (yes: really. But this home-made iced decaf is a quick and indulgent drink we’ve been enjoying on hot summer afternoons when I need to cut off my caffeine intake to ensure a good night’s sleep.
Try 22g of ground coffee brewed with 190F water for a finished 300g cup of iced coffee. Add cream (yes: full 35% cream) to taste.
OOPS EDIT! Added too much hot water in the video above so iced coffee was lukewarm 🙁 Don’t be like me: don’t add too much hot water to make sure your iced coffee is … Iced 🙂
NotSoAncient Tip: besides grind size – bean/water ratio, water temp, steep time and agitation (method, speed and length) will also contribute to your brew. Experiment but, most of all, enjoy the process 🙂
How to Fix a leaky Aeropress Seal
Instead of buying an entirely new Aeropress like I did, here’s 2 solutions and a tip for preventing the dreaded Aeropress rubber seal leakage.
A quick Google search found this relatively easy mineral oil fix. DISCLAIMER: I haven’t tried this method so try at your own risk. Make sure to read the video’s description for the full explainer.
And if that’s too much work, or you don’t want to deal with heating up oil and rubber in your microwave, special thanks to my good friend (and fellow coffee lover) Greg Gibson for the tip of purchasing a new rubber seal instead of the entire Aeropress.
Conclusion
As you can see, making the perfect cup of coffee is part science and part art.
Hopefully this article gives you the tools and techniques to get you and your Aeropress one step closer to your very own personal caffeinated nirvana.
Like a lot of things in life, flipping things upside down gives a fresh perspective …. And may just lead you to a better brew … Or not 🙂
Thanks for reading and if you’re needing to pick anything up for your coffee addiction, please use the links below to support this site.
Happy brewing!


