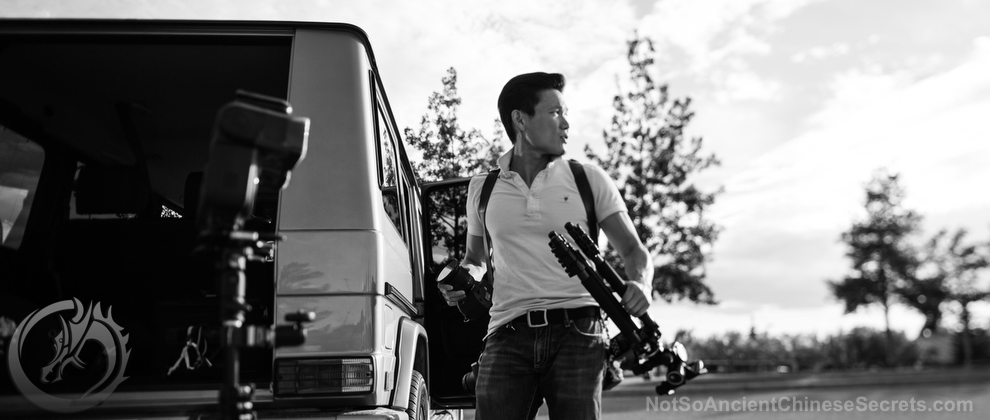
Apparently I’m never quite satisfied with the gear we use. Case in point: seeing just how much we’ve changed since our previously published gear guide (circa 2013).
Everybody’s shooting style and preferences will be different, but we get asked a lot about the gear we use, so without further adieu, below is what we’re currently lugging around the world for our photo adventures.
Camera Kit
![]()
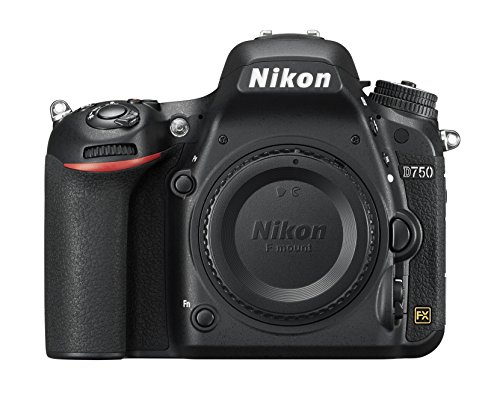
+ 4x Nikon D750 camera bodies. The best wedding camera we’ve ever used. You can read our on-going review here.
![]()
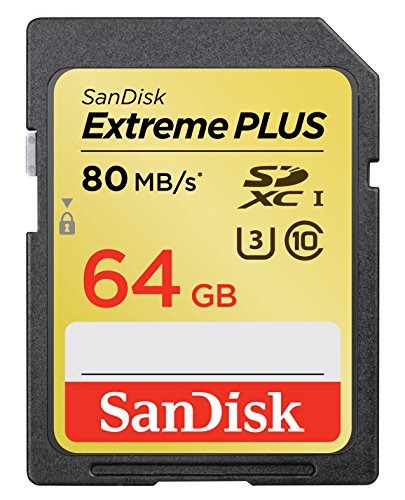
+ 16x SanDisk 80MB/sec 64GB SDXC Memory Cards. The D750 sadly simultaneously creates bigger files and has a smaller buffer than our Nikon Df’s. This 80MB/s SD card is currently our price/performance favourite and allows the buffer to clear faster which is crucial for fast-paced shooting. We pop 2 in each cam and like to have enough for back-to-back wedding shoots.
![]()
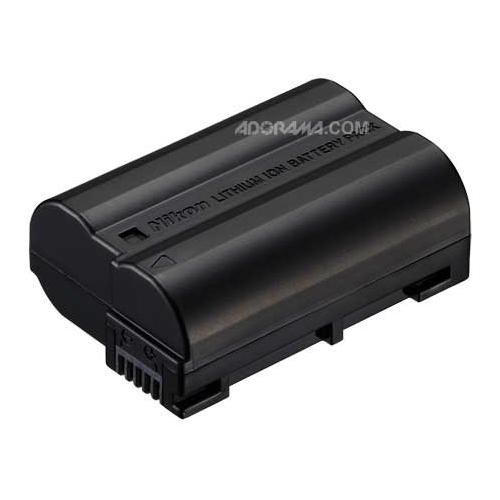
+ 12x spare Nikon EN-EL15 Batteries. The D750’s battery life is not great. Maybe I was spoiled by the never-ending battery life of our Nikon Df’s, but you’ll want a couple spare batteries for each camera to avoid the nightmare of running out of juice at just the wrong time.
![]()
+ 2x Watson Duo Battery Chargers. I’m planning on blogging about our ultimate travel charging system, and this is a big part of it. Though this international charger is a bit pricey, it charges 2 batteries at once and you can buy inexpensive plates to charge other common camera batteries which makes the Watson Duo Charger a versatile and outlet-friendly travel charging buddy.
![]()
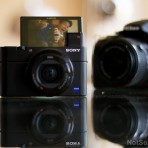
+ The amazing Sony RX100M3. Freshly back from family travels in Germany and Vienna and this unassuming camera continues to earn its praise of being the best point and shoot I’ve ever used. Read our full review here.
+ The Nikon D5300, though a cropped frame, is our go-to video camera. Why? The LCD can be manipulated to face frontwards so I can do my video tutorials without the need for an external monitor. It’s also a great super-light travel camera which our eldest son has adopted as his own.
Lenses
For those who have been following our gear guides, you may have noticed we’ve down-sized our glass to mostly f1.8 glass. After years of chasing the best (and most expensive) glass we could find, we’ve sold all our super-fast f1.4 glass and have settled for simpler, smaller and lighter f1.8 lenses. Our in-focus keepers, backs and wallet are happier for it. For our wedding and destination work, we’ve found the more compact and lighter f1.8 lenses not only easier to pack, but faster to focus in low light. Bonus: our lens kit is very affordable and easy to invest in one piece at a time. I’ve listed the lenses in order from most-used to least to make your purchasing decisions easier.

![]()
+ 2x Nikon 35mm f/1.8G Lenses. Quin and I love this lens so much, we have one each so we don’t have to fight over it 🙂
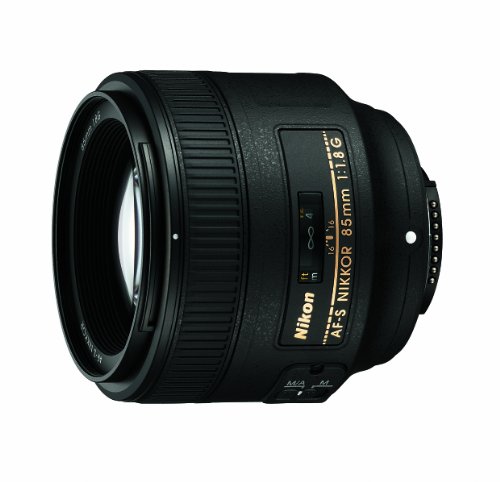
![]()
+ 2x Nikon 85mm f/1.8G Lenses. Stunning optics and fast focus make the 35mm + 85mm combo our go-to faves for 98% of our shooting.
![]()
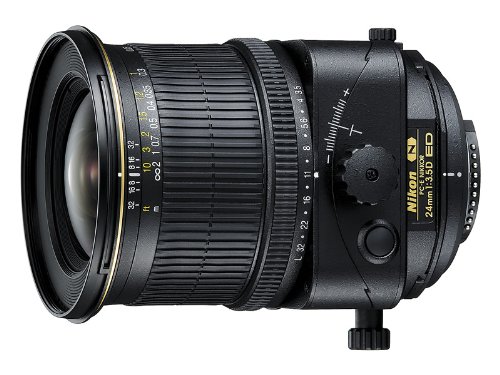
+ Nikon 24mm f/3.5D Tilt-Shift Lens. A beast of a lens and limited to manual focus, but oh what a treat when the stars (and angles) align.
+ Nikon 24mm f/2.8D Lens. Only used when I need something wider – typically family formals or really tight spaces.
+ Nikon 50mm f/1.8G Lens. We use this more for video, but really dig this inexpensive yet optically great piece of glass.
+ Nikon 70-300 VR Lens. Purchased not for professional work, but for shooting our kids’ sports. Not the best optics, but relatively light for the reach when you need to shoot from the sidelines.
Radio Shoot-Position Controlled Flash System
Let’s be clear: there’s no perfect shoot-position radio-controlled system that I know of. But this is what we’re currently using and (so far) happy with.
+ 4x Nikon SB-910 Speedlights. We’ve tried other flashes, but sadly nothing has held up as well as our trusted flagship Nikon’s (still using our beat up SB900’s that keep on ticking!).
+ 4x YONGNUO YN-622N Kits. We’ve only shot one wedding with it as of me typing this, and there are a few issues we’ve seen and heard of, but so far it’s proven reliable enough for us to give it more time as our main radio system. Mini Review: it’s pretty solid for remote MANUAL flash control. I’ve heard there may be issues when using it in TTL mode, but we don’t ever shoot in TTL, so haven’t come across this. But honestly for the asking price, they’re a bargain and work better than MUCH more expensive competitors we’ve tried. Full review forthcoming.
+ These Eneloop AA batteries are the best rechargables I’ve ever used. This kit includes a handy international travel-charger with folding prongs (not the fastest charger, but convenient and compact for traveling). I have 60 Eneloop AA batteries and enough of my favourite chargers to charge them all at once.
![]()
+ Quantum Turbo 3 NiMH Battery Pack. Reduces recycle time and heat for our hard-working strobes. Typically only used when shooting family formals or outdoors. There are lots of cheaper lithium battery choices out there too, but for air travel, NiMH chemistry won’t raise eyebrows as much as a big honkin lithium. Don’t forget to pick up a couple of cables too.
Ultimate Travel Camera Bags
Good news and bad news.
Bad news first: I’ve been meaning to do a full write-up on how we sneak all our essential shooting gear on planes as carry-on. But alas – it’s been over a year and I still haven’t written it 🙁
Good news: I’m just gonna give you the links to the trusted bags we’ve managed to get on even the tiniest of planes. From rolling down the streets of New York to safely ferrying our gear to India, these 2 bags are the it.
+ I learned the hard way on our very first destination wedding in 2005 that a LOT of planes can’t fit roller cases on board. Even so-called “International Carry-on Approved” luggage won’t fit on many smaller planes. The Lowepro Pro Roller X200 has been our NotSoAncientChineseSecret to getting our gear on even the tiniest of planes. Its superpower? It can transform itself into a backpack + roller. This simultaneously lightens your load AND allows it to fit in the tiny foot-space in front of your seat. Yes: fully loaded this roller bag will be overweight. Solution: work out and make it look light. Yes: it’s a *very* tight squeeze under the seat in front of you. But hey: your gear will be safely stowed with you in the cabin instead of being tossed by the (un)loving hands of baggage handlers. For the pro and amateur alike, this is great peace of mind. Tip: if the ticketing agent says this roller has to be gate-checked, don’t sweat it – let the agent tag your bag and thank them as you move along. Then, when you get to the gate, unzip the backpack and gate-check ONLY the empty roller. This trick has gotten our gear safely onto every plane we’ve flown – even the tiniest twin prop. You’re welcome.
+ Unassuming and cavernous, our original Thinktank Urban Disguise 60 is my favourite travel laptop bag ever. After almost a decade of faithful service, the only wear I can see is on the neoprene stretch side-pocket. Amazing when you consider how many miles this thing has been abused over. If you’re looking for something smaller, the Urban Disguise 50 is its little brother (which we also own) which inherits the same awesome design and build quality. Personally, I appreciate the extra room of the UD60 so the UD50 more often than not stays home. Bonus: these Urban Disgiuse series bags fit perfectly over the rolling handle of the Lowepro Pro Roller x200, making light work of navigating airports worldwide.
Ninja Lighting Gear
The following items have proven their weight in worth and more. If it’s good enough to make it into our necessary travel gear, you know it’s DQ Superflash approved.

![]()
+ 3x Manfrotto Nano Clamps. Combine this with the ball-head below and you’ve got the smallest, most rock-solid and versatile flash grip I’ve ever used. Make sure to purchase this one which includes the 1/4-20 screw adapter which you’ll need to mount the ballhead below.
+ 3x Manfrotto 492 Ball Heads. I’ve tried many other small ball-heads, but this is the strongest and most reliable of the bunch. Mated to the nano clamp above it’s our NotSoAncientChineseSecret weapon for securing flashes in strange places.

+ 4x QuiKlips flash clips. Yup: we made em and sell em. They’re on every flash (and radio) we own and can’t imagine shooting a wedding without this super-accessible side-kick.
+ 2x Holdfast MoneyMakers. I’ve tried every sling and holster I can get my hands on and this is the most comfortable way to hold 2 cameras on long wedding days. Bonus: adds a stylish flair to any outfit and will be sure to get compliments.
+ The Slik quick-release Carbon Fibre Monopod is super-light and sturdy. Stick a flash on the end and you’re ready for your very own light-on-a-stick adventure.
+ 2x Manfrotto Nano Stands. I’ve owned several of these for years and love this compact travel-worthy stand which can be easily hidden behind a couple for the perfect rim-light. I’ve since moved on to another almost identical stand with quick-release clamps and higher maximum weight, but sadly the manufacturer of the ones I use have switched their quick-release clamps to the typical twist-type (boo!) 🙁 So yeah: this Manfrotto Nano is a good choice and will last for years.
Our Favourite Light Modifiers
+ The Photoflex Extra-small Octodome is our hands-down favourite couple-time lighting modifier. For extra points, pick up the grid for ultimate spill control.
+ 4x Magmod Grid Kits. Brilliant idea for off-camera flashers (get it?). They’re faster to setup and give better quality of light than the competitors I’ve tried. Its two weaknesses are the weight and sometimes-fussy magnets. If I don’t have room/weight to pack them, I’ll bring a ZootSnoot for quick, hard, light.
+ Double-fold shoot-through umbrella. Versatile light-sucking soft light. Great for formals and a necessary element in every Strobist‘s arsenal.
Sticks and Video Gear
We’re not pro videographers, but here are the tools we use to shoot the videos you see on this website.
+ The Velbon E640 Carbon Fiber Quick-Lock Tripod has been our trusted sticks for years. As you might notice, I’m a fan of quick-release levers vs screws. Makes for super-quick setup and the carbon fiber is feather-light.
+ The Acratech Ultimate Ballhead is the perfect match for the carbon fiber legs above: strong, lightweight and field serviceable (look ma – no grease!). From the unforgiving desert sands of Africa to the frigid cold of Canada, this ball-head has proven to be a reliable friend. This is our favourite head for travel and quick-paced photography (not recommended for video).
+ 2x Manfrotto 500-Series Fluid Heads. Smooth and strong, it sits on our tripod above and slider below for quick-release compatibility on all our video shoots.
+ Looks like I’ve got a thing for tripod heads (oops). The Manfrotto 410 Junior Geared Head is great for architectural photography and as a support for the KONOVA K3 Slider 80cm featured below. Its exact movements make precise adjustments possible even when under heavy loads.
+ KONOVA K3 Slider 80cm. If you’re wanting to take your video production to the next level, I highly recommend this rock solid and silky smooth slider.
+ When space is tight and mobility matters, the Manfrotto Fluid Video Monopod is a great solution and sports the same quick-release plate as the Manfrotto 500-Series Fluid Head noted above.

![]()
+ I just purchased the Fotga DP500IIS follow-focus and can’t wait to start using it. Initial tests make me hopeful that this kit will reduce my video creation time significantly by allowing repeatable, quick and accurate focus. You’ll need to pick up a rail and some lens belts to complete this (relatively inexpensive) follow-focus system.
+ My most recent purchase is this Ikan VK7i-S HDMI LCD Monitor. I was planning on selling my D5300 and this was the solution for doing video-selfies with our non-front-facing D750’s. We ended up “giving” the D5300 to our eldest son, so we’ll see what I end up using more. If you want to do video selfies and don’t have a DSLR with a front-facing LCD screen, this is a great option. Bonus: this unit can run off third-party Sony L-compatible batteries.
+ Upping the quality of your audio is one of easiest ways to increase the quality of your video. Case in point: Many will watch a tiny 320pixel video if the audio is decent, but won’t suffer even a decently-shot video if the audio is unintelligible. Recording with the Sennheiser MKE 400 Microphone is an easy way to elevate your audio game and is miles better than any built-in mic I’ve heard. If you ever want to shoot outdoors, pick up the matching wind muff (a.k.a. a dead cat … but don’t hate – I love cats!).
+ I initially bought this Sony Wireless Microphone System to do live-demos at our Motibodo tradeshow booth. But it’s taken on a second life as my go-to system for recording audio on all our video tutorials. Definitely a splurge, but I love the freedom and increased audio quality it gives me – an admitted Audio Nerd (my former audio engineering past is showing through). Extra-NotSoAncient Audio-Nerd points for upgrading the mic to this waterproof one. Super-pro-tip: I cut up little 1″ pieces of Moleskin and tape the Countryman mic under my shirt between my pecs. Makes for more even spoken word (i.e. you can turn your head without losing too much volume) and the moleskin simultaneously acts as a wind-screen and protects from shirt-rubbing noises (the only man-boob win I know of).
THANK YOU! + the NotSo Fine Print
I hope you’ve found a few tools here that will help make your life easier and more fulfilled.
Most links and images above will take you to your local Amazon website. You can also use these links to shop at Adorama, B&H Photo and Ebay. As affiliates we get a small percentage of qualifying purchases but rest assured you won’t pay a cent more than buying it elsewhere. Thank you!
Lastly, I’d love to hear from YOU. Please don’t be shy and hit me in the comments!
Thanks for reading and happy shopping!